Comprehensive Guide to Setting up Defender for Office 365 with Microsoft 365 Business Premium
Hello and welcome! As a business owner and Microsoft Solutions Partner, I understand how vital it is to keep your email and applications safe from the myriad of cyber threats out there today—like phishing, spam, and malware. It’s more than just a necessity; it’s a critical component of your business operations. That’s why I’ve developed this straightforward, step-by-step guide to configure Microsoft Defender Microsoft 365 in Business Premium, including the robust Defender for Office 365 P1 and Defender for Endpoint. Whether you're somewhat tech-savvy or diving into the admin panel for the first time, this guide will help you with setting up Defender for Office 365 and Microsoft Defender for Business to secure and streamline your email and app protections with ease. Let’s get started and turn these advanced features into practical, everyday defenses for your business.
Step 1: Configure SPF Record
- Goal: Authenticate outbound emails to prevent spoofing.
- Example Actions:
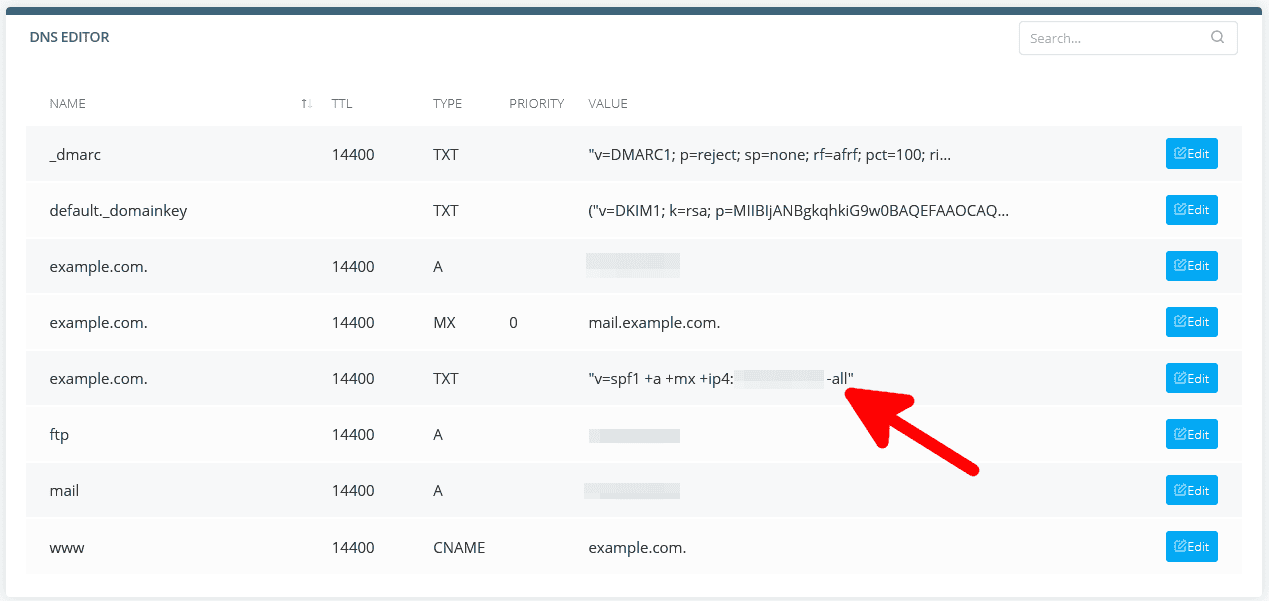
Verify Domain Setup: Check your domain in Microsoft Defender portal under Setup > Domains. Ensure it’s properly configured before proceeding.
Create SPF Record: Add a TXT record in your DNS management console (e.g., GoDaddy, Bluehost). If your email is exclusively from Microsoft, your record would be:
makefile
Copy code
v=spf1 include:spf.protection.outlook.com -all
This tells other email servers that only emails coming from Microsoft's infrastructure are valid for your domain.
Test SPF Record: Use MXToolbox’s SPF Test to verify your record’s validity. This ensures your SPF is set up correctly and functioning.

Step 2: Configure Email Authentication with DKIM and DMARC
Goal: Enhance email authenticity and instruct receiving servers on handling emails that fail checks.
Example Actions:
- Enable DKIM: In the microsoft defender for office 365 portal, go to Policies & Rules > Threat policies > DKIM. For your domain, click 'Enable' and follow the prompts to create necessary DNS records.
- Set up DMARC: Add a DMARC record in your DNS settings like:
css
Copy code
v=DMARC1; p=quarantine; pct=100; rua=mailto:dmarcreports@yourdomain.com
This sets DMARC to send reports to your specified email and advises receiving servers to quarantine emails that fail DKIM or SPF checks.
Monitor Reports: Regularly check DMARC reports sent to your specified email to adjust your settings based on the analysis of failed emails.
Step 3: Enable Unified Audit Log
- Goal: Log and monitor all activities across Microsoft 365 services.
- Example Actions:
- Activate Audit Logging: Navigate to the Microsoft 365 Compliance center. Go to Audit and ensure logging is enabled. This captures all user and admin activities across Microsoft 365.
- Review Audit Data: Schedule monthly reviews of audit logs to detect unusual activities like unauthorized access or abnormal file deletions.
Step 4: Enable Alert Policies
- Goal: Automate alerts for suspicious activities.
- Example Actions:
- Configure Alert Policies: Go to the Microsoft 365 Defender portal, select Alerts > Policies. Create or edit policies that suit your needs, such as alerts for failed login attempts or large file deletions.
- Assign Recipients: Assign team members to receive these alerts, ensuring quick actions can be taken against potential threats.
Step 5: Configure and Manage Defender for Office 365 Settings
- Goal: Shield against sophisticated email threats.
- Example Actions:
- Preset Security Policies: Opt for 'Standard Protection' under Policies & Rules > Threat policies > Presets for baseline protection. If your users handle sensitive data, consider 'Strict Protection'.
- Customize Policies: Adjust anti-spam and anti-phishing policies to better fit your business needs. Increase filtering strictness for departments like finance or HR that are more likely to be targeted by phishing.
Step 6: Manage Email Forwarding and Phishing Reports
- Goal: Control data flow and enhance user participation in security.
- Example Actions:
- Block Auto Forwarding: In the Exchange admin center, navigate to Mail flow > Rules and set a rule to block automatic forwarding to external addresses, preventing potential data leaks.
- Enable Reporting Add-ins: Install the 'Report Message' add-in via the Microsoft 365 admin center so users can directly report suspicious emails, aiding in real-time threat detection.
Conclusion and Next Steps
Congratulations on making it through the guide to securing your emails and applications! By now, you should have a solid grasp on configuring essential protections to safeguard your business communications effectively. However, cyber threats are ever-evolving, and staying ahead can sometimes require more than just a proactive approach—it might need a professional touch.
If you find yourself needing a bit more help, or if you prefer to focus on your core business activities while a trusted expert handles your cybersecurity, we're here to help. At Communication Square, we specialize in setting up Defender for Office 365 and tailoring Microsoft security solutions to fit your specific business needs. Why not check out our services and see how we can enhance your security setup? Visit us at Microsoft Email and Apps Protection for more details. Secure your business with us, and gain peace of mind knowing your communications are protected by the best in the business. Let's partner together to keep your digital environment safe and sound.
Remember, implementing these security measures is just the beginning of a continuous improvement journey. Regularly review your settings, stay updated on the latest security practices, and keep your team informed and trained. Together, we can ensure that your business not only survives but thrives in the digital age.
By following these steps on setting up Defender for Office 365, you’re well on your way to securing your business communications effectively. This setup is crucial in defending against today's sophisticated cyber threats. For ongoing support and expert assistance in setting up Defender for Office 365, Communication Square is ready to partner with you for a more secure digital environment.
Last Updated 7 months ago

